Technology

Team-Based Learning with Google Form

Team-based learning is a pedagogical approach that facilitates learning through individual testing and group collaboration. Students are first given time to work on answers individually using the Individual Readiness Assurance Test (iRAT). They then work in teams to discuss the same problems in order to arrive at a consensus and check their answers against a pre-filled MCQ scratch card that reveals if their selected answer is correct or wrong, after which an immediate feedback is given. This is known as the Team Readiness Assurance Test (tRAT). If they got the answer wrong, teams get a chance to either appeal their answer or to try the same question again. A clarification session then ensues, with teachers focusing more on questions that teams have difficulty in.

Schools that want to use Team-Based Learning might either subscribe to platforms that allow for repeated attempts such as InteDashboard or purchase the Immediate Feedback Assessment Technique (IF-AT) scratch cards. There are some free options such as that from Cosma Gottardi.

However, I was wondering if a simple one could be done with Google Form, using the quiz mode together with branching options, to achieve the same results. I tested it out immediately last night and came up with this proof-of-concept. It seems possible and easy to edit.

I created a template for anyone who is keen to try:

https://docs.google.com/forms/d/1l2msnjt2ioSWcmz4GpQWgm1_CoFBRQDmBOwZQopnefI/edit?usp=sharing

Centrifuge Toy

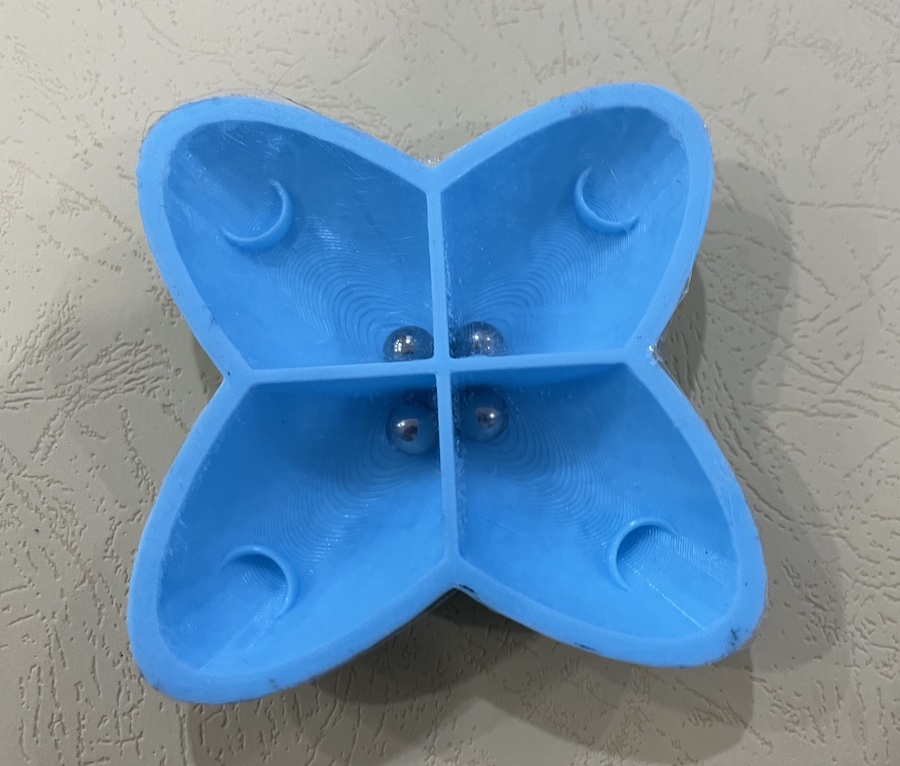
I designed this 3D teaching tool using Tinkercad and printed it out so that my colleague can use it to demonstrate the effect of a centrifuge.

As the toy is being spun, the ball bearings will appear to be thrown outwards. The centripetal forces that are meant to keep them in circular motion is made up of friction and any contact force due to the curvature of the base. If the rate of spin is sufficiently high, there will be insufficient contact force keeping the ball bearings in a circular path and hence, they will spiral outward and land into the cups found near the ends when the spinning stops.

Anyone can 3D-print this design as it had been uploaded into Thingiverse. This is my first original submission and can be found here. You will need 4 tiny balls of no more than 8 mm in diameter. The top is to be covered with a clear sheet of plastic cut-out after tracing the shape using a marker. The sheet can be stuck on the top using normal glue. This plastic cover serves to ensure the balls do not fly out if spun too fast.

A centrifuge toy to demonstrate the effects of rotational motion with insufficient centripetal force.

3D printed Meissner tetrahedrons

These are my 3D-printed Meissner tetrahedrons, each maintaining the same height when rolled in any direction. The Meissner tetrahedron is a 3D version of the 2D Reuleaux triangle, which is a triangle with constant width. A flat platform can be placed on top and remain level when pushed around. The STL files can be obtained from Thingiverse. Sliced using Cura (with treelike supports) and printed with my Creality Ender 3.

Not exactly a physics teaching aid, but it demonstrates the affordance of 3D printing, which allows us to produce interesting objects overnight for lessons or if inspiration strikes. I am going to print a Gomboc next, which is an object when resting on a flat surface have just one stable and one unstable point of equilibrium, and is relevant to the topic of turning effects of forces.

3D printed teaching aids

I bought a Creality Ender 3D printer in 2020 (going at about $270 at Lazada now), at the height of the pandemic and have been using it to print physics-related teaching aids for a while, including balloon hovercrafts, catapults, a Pythagorean cup, tippy top and a vertical axis wind turbine. In addition to complete demonstration sets, it is also handy for printing parts to fix old demonstration sets such as a base for a standing cylinder with spouts at different heights.

The Creality Ender 3 3D printer

This is a video compiled with the objects that I printed in recent months. The lime green filament that I used were purchased at $16.40 for 1 kg from Shopee. Therefore, each of the prints shown in the picture cost between forty cents to four dollars’ worth of filament.

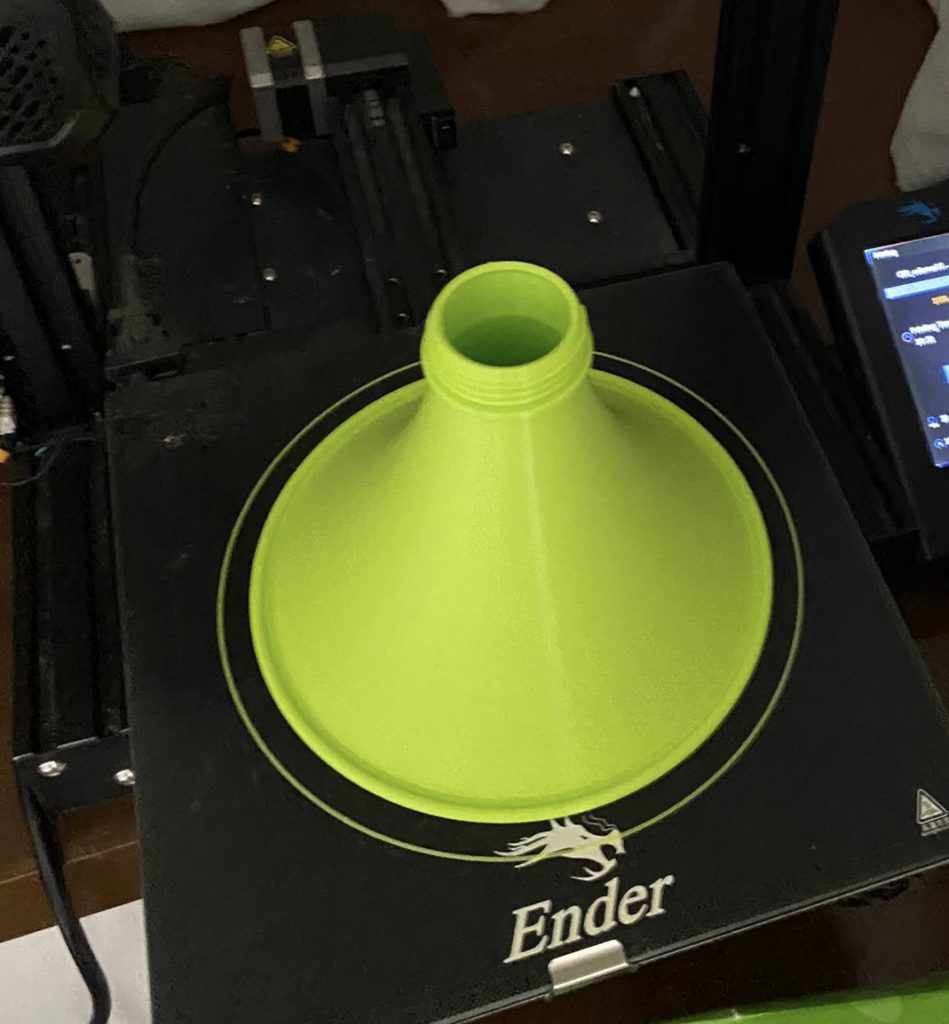
The first is a coin funnel that can be used to demonstrate how centripetal force keeps objects moving in circles. As the energy of the coins decreases due to friction, the radius of the circle gets smaller and its speed actually increases. This forms a cognitive dissonance that often surfaces when we discuss satellites losing altitude in orbit.

The second is a tensegrity structure which can be used to teach about moments and equilibrium.

The third is a marble run set that was really just lots of fun to watch rather than teaching any difficult concept other than energy changes.

The fourth is a series of optical illusions that can be used to promote thinking about how light from reflections travel.

The final print is a cup holder that can be swung in vertical loops with a cup full of water. This is the most popular print among my colleagues and will certainly be used in term 3 for the JC1 lessons on circular motion.

Internal Resistance and Terminal Potential Difference

https://www.geogebra.org/m/puvfjxk5

This applet demonstrates how terminal potential difference (as measured by the voltmeter across the terminals of the battery) changes depending on :

  1. internal resistance r
  2. external resistance R
  3. emf E
  4. when a switch is turned on and off
<iframe scrolling="no" title="Internal Resistance and Terminal Potential Difference" src="https://www.geogebra.org/material/iframe/id/puvfjxk5/width/640/height/480/border/888888/sfsb/true/smb/false/stb/false/stbh/false/ai/false/asb/false/sri/false/rc/false/ld/false/sdz/false/ctl/false" width="640px" height="480px" style="border:0px;"> </iframe>