These are my 3D-printed Meissner tetrahedrons, each maintaining the same height when rolled in any direction. The Meissner tetrahedron is a 3D version of the 2D Reuleaux triangle, which is a triangle with constant width. A flat platform can be placed on top and remain level when pushed around. The STL files can be obtained from Thingiverse. Sliced using Cura (with treelike supports) and printed with my Creality Ender 3.
Not exactly a physics teaching aid, but it demonstrates the affordance of 3D printing, which allows us to produce interesting objects overnight for lessons or if inspiration strikes. I am going to print a Gomboc next, which is an object when resting on a flat surface have just one stable and one unstable point of equilibrium, and is relevant to the topic of turning effects of forces.
I bought a Creality Ender 3D printer in 2020 (going at about $270 at Lazada now), at the height of the pandemic and have been using it to print physics-related teaching aids for a while, including balloon hovercrafts, catapults, a Pythagorean cup, tippy top and a vertical axis wind turbine. In addition to complete demonstration sets, it is also handy for printing parts to fix old demonstration sets such as a base for a standing cylinder with spouts at different heights.
The Creality Ender 3 3D printer
This is a video compiled with the objects that I printed in recent months. The lime green filament that I used were purchased at $16.40 for 1 kg from Shopee. Therefore, each of the prints shown in the picture cost between forty cents to four dollars’ worth of filament.
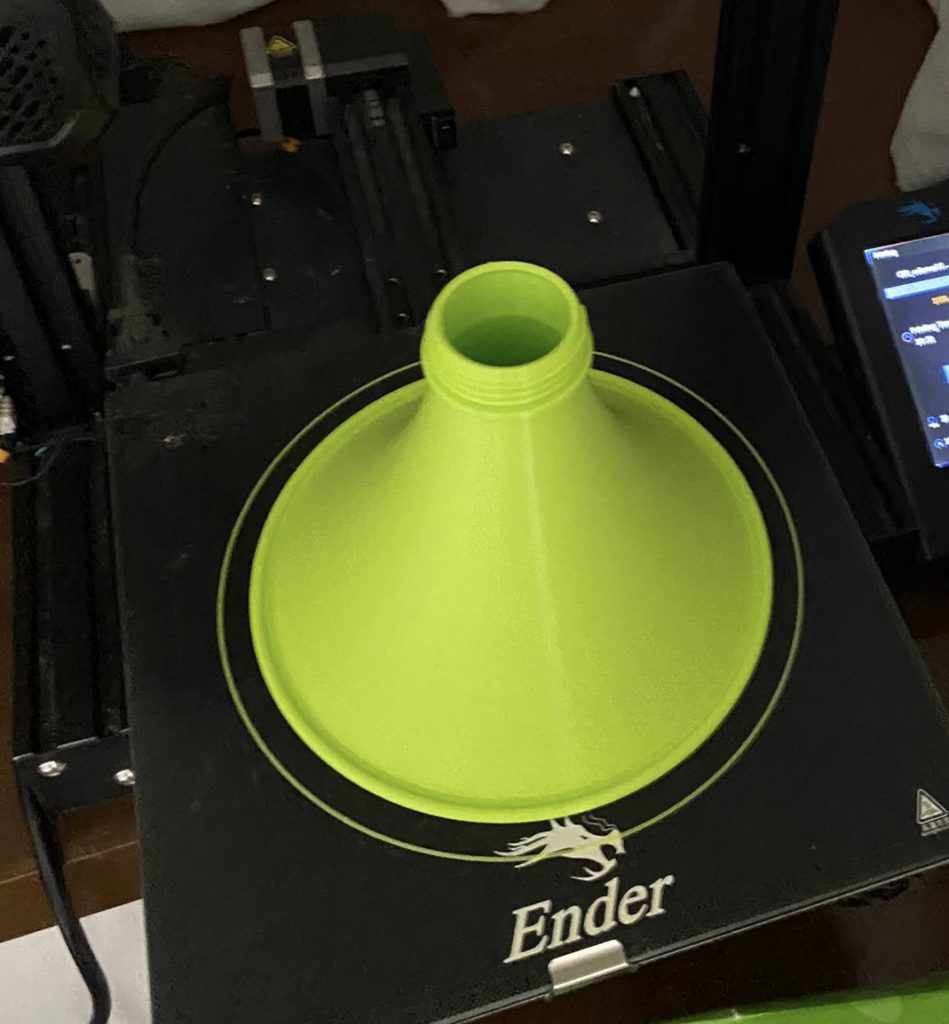
The first is a coin funnel that can be used to demonstrate how centripetal force keeps objects moving in circles. As the energy of the coins decreases due to friction, the radius of the circle gets smaller and its speed actually increases. This forms a cognitive dissonance that often surfaces when we discuss satellites losing altitude in orbit.
The second is a tensegrity structure which can be used to teach about moments and equilibrium.
The third is a marble run set that was really just lots of fun to watch rather than teaching any difficult concept other than energy changes.
The fourth is a series of optical illusions that can be used to promote thinking about how light from reflections travel.
The final print is a cup holder that can be swung in vertical loops with a cup full of water. This is the most popular print among my colleagues and will certainly be used in term 3 for the JC1 lessons on circular motion.
There is a new internet trend called “tensegrity” – an amalgamation of the words tension and integrity. It is basically a trend of videos showing how objects appear to float above a structure while experiencing tensions that appear to pull parts of the floating object downwards.
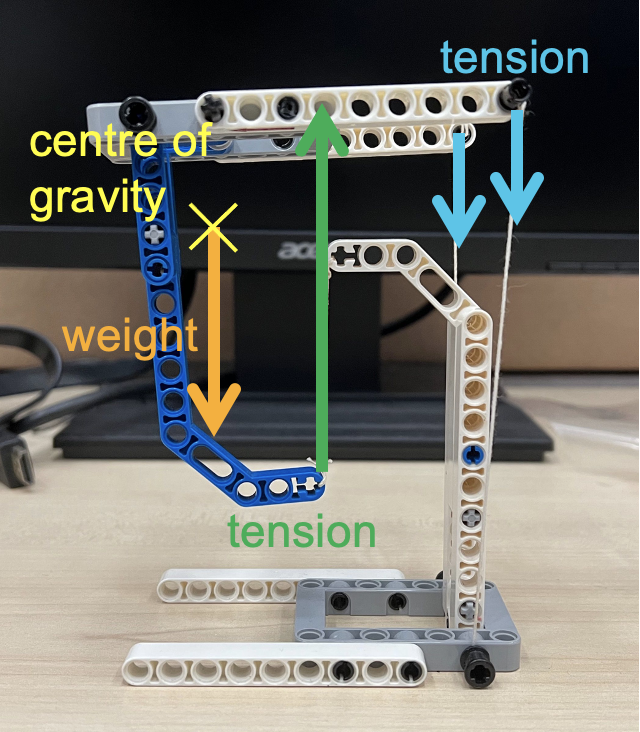
In the diagram below, the red vectors show the tensions acting on the “floating” object while the green vector shows the weight of the object.
The main force that makes this possible is the upward tension (shown below) exerted by the string from which the lowest point of the object is suspended. The other tensions are downward and serve to balance the moment created by the weight of the object. The centre of gravity of the “floating” structure lies just in front of the supporting string. The two smaller downward vectors at the back due to the strings balance the moment due to the weight, and give the structure stability sideways.
This is a fun demonstration to teach the principle of moments, and concepts of equilibrium.
The next image labels the forces acting on the upper structure. Notice that the centre of gravity lies somewhere in empty space due to its shape.
Only the forces acting on the upper half of the structure are drawn in this image to illustrate why it is able to remain in equilibrium
These tensegrity structures are very easy to build if you understand the physics behind them. Some tips on building such structures:
Make the two strings exerting the downward tensions are easy to adjust by using technic pins to stick them into bricks with holes. You can simply pull to release more string in order to achieve the right balance.
The two strings should be sufficiently far apart to prevent the floating structure from tilting too easily to the side.
The centre of gravity of the floating structure must be in front of the string exerting the upward tension.
The base must be wide enough to provide some stability so that the whole structure does not topple.
Here’s another tensegrity structure that I built: this time, with a Lego construction theme.
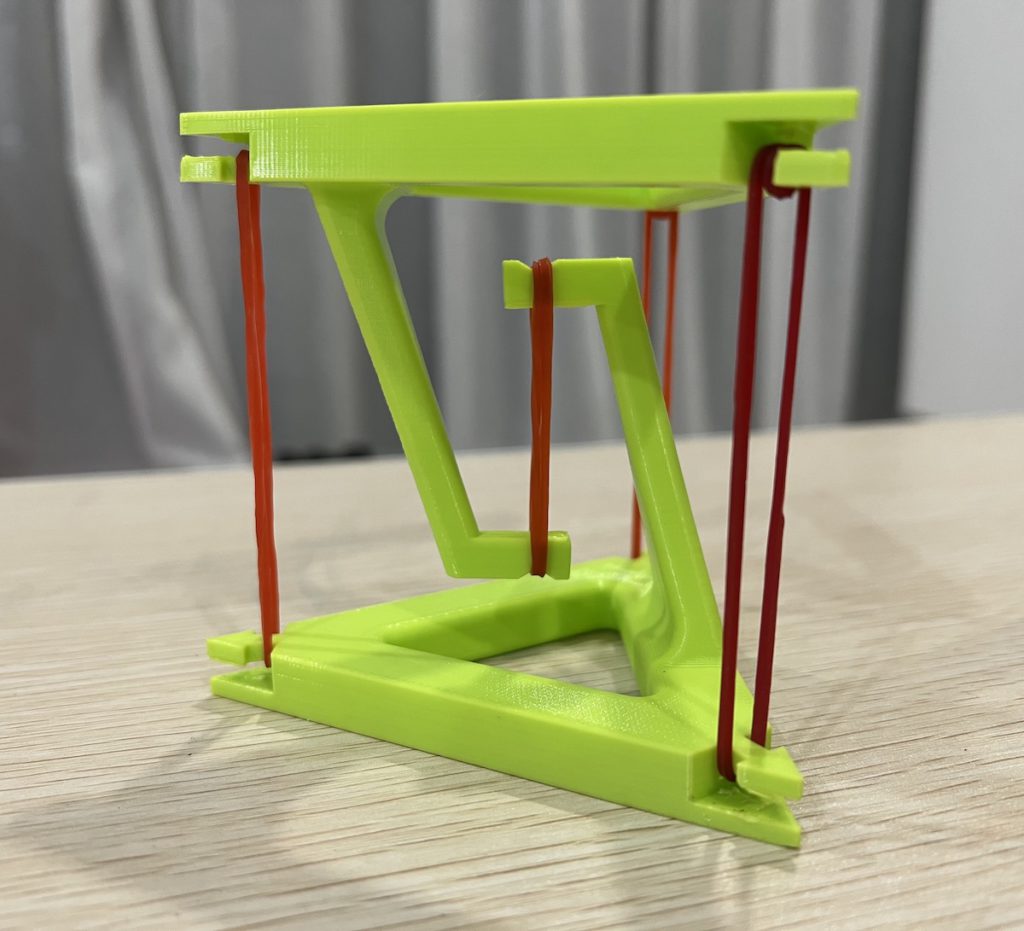
Apart from using Lego, I have also 3D-printed a tensegrity structure that only requires rubber bands to hold up. In this case, the centre of gravity of the upper structure is somewhere more central with respect to the base structure. Hence, 3 rubber bands of almost equal tension will be used to provide the balance. The STL file for the 3D model can be downloaded from Thingiverse.com.
The main challenge in assembling a tensegrity structure is the adjustment of the tensions such that the upper structure is balanced. One way to simplify that, for beginners, is to use one that is supported by rubber bands as the rubber bands can adjust their lengths according to the tensions required.
3D-printed tensegrity table balanced by rubber bands
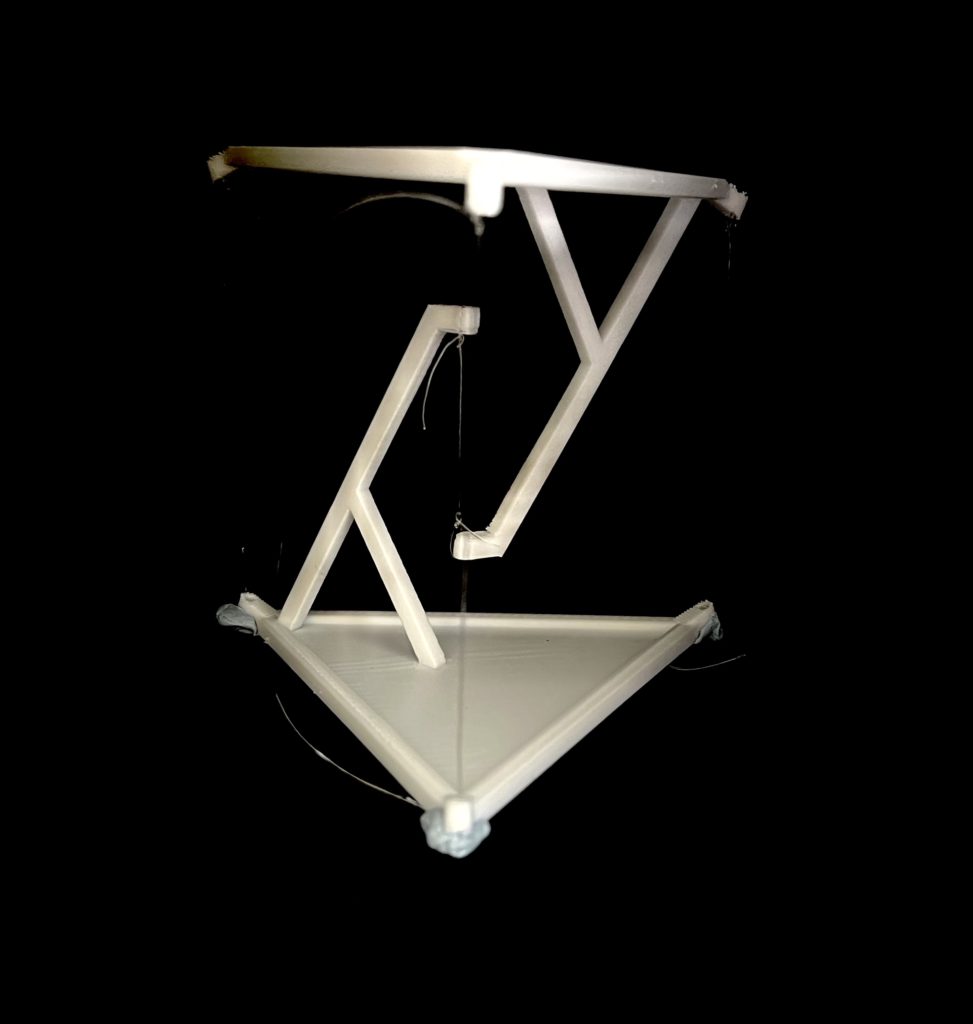
Another tip is to use some blu-tack instead of tying the knots dead such as in the photo below. This is a 3D printed structure, also from Thingiverse.
3D-printed tensegrity table held up and balanced by nylon string
(This post was first published on 18 April 2020 and is revised on 24 August 2022.)
Came across a question recently that many students answered incorrectly.
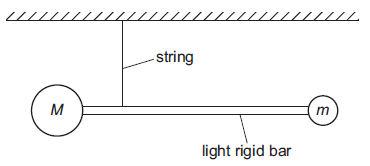
Close to the surface of the Earth the gravitational field strength is uniform. A pair of unequal masses are joined by a light, rigid horizontal bar and suspended by a string from their centre of gravity as shown. The mass M of the ball on the left is larger than the mass m of the ball on the right.
The supporting string is now cut and the system begins to fall. Air resistance is negligible.
Which statement is correct?
A
The bar will remain horizontal as it falls.
B
The bar will rotate clockwise as it falls.
C
The bar will rotate anti-clockwise as it falls.
D
The bar will first rotate clockwise and then rotate anticlockwise as it falls.
Without air resistance
This question supposes that air resistance is negligible and so the only forces initially acting on the object is weight. The answer that many students gave incorrectly as B because they assume that the larger weight acting on the larger mass will bring about a larger acceleration.
Since the object begins in equilibrium, and the acceleration of both objects is just gravitational acceleration, the bar will remain horizontal.
With air resistance
This then invites a question: What if there is air resistance?
To consider the vertical acceleration on both balls, we need to consider the net force $F_{net}$, which is the vector sum of weight $W$ and air resistance $F_R$, ignoring the tension exerted by the rod at the initial stage of the fall.
$$F_{net} = W – F_R = V \rho_{ball}g – \dfrac{1}{2} \rho_{air}v^2C_DA$$
The volume V of a sphere is proportional to $r^3$ and its cross-sectional area A is proportional to $r^2$,
A larger radius will imply a larger increase in V than A, and hence, a large $W$ than $F_R$. This will then allow the larger mass to experience a larger acceleration than the smaller mass in the initial stage.
This applet highlights the parts of a circuit that becomes live depending on the state of a switch and the type of electrical fault in a device. It also demonstrates the roles of the fuse and earth wire in preventing accidents.