This animation is made using Geogebra. It shows the instantaneous velocity and displacement vectors of a particle undergoing simple harmonic motion while tracing its position on the velocity-displacement graph. It is meant to help student understand why the graph is an ellipse.
Try using the values in this simulation to find the velocity of this wave! Let me have your answer in the comment section!
Update on 21 August 2018: The latest iteration of this App is found here:
I am once again exploring the use of Geogebra to create simulations for Physics. This is what I managed to put together. It serves to help students visualise how a particle in a transverse wave moves. The slider allows the user to pick any particle along the horizontal direction of the wave.
A recent trending phenomenon on the internet is the audio recording of a word, which is interpreted different by two groups of people – those who hear it as “Laurel” vs those who hear “Yanny”.
To find out which camp you are on, right-click to download this mp3 file and or listen by clicking the “play” button below!
Personally, I hear it as “Laurel” and it has got to do with the fact that the audible frequencies of my ears are pretty limited, thanks in part to my age. For an explanation, watch this video:
Now that you have found out why this recording could potentially “divide a nation”, it is worth considering it as part of an activity to pique students’ interest and activate learning. Students can be prompted to rely on their prior knowledge and experience to generate questions using a thinking routine such as “Claim-Support-Question“.
As an activity to promote thinking and discussion, students can be asked to test if the claim made by this video is true. They can conduct experiments to test their own audible frequencies using audio recording and generating software such as Audacity which is open source and easy to use. With the whole class participating, there should be enough data to figure out if there is a pattern between the frequencies that the “Yanny” camp can hear that the “Laurel” camp can’t and vice versa.
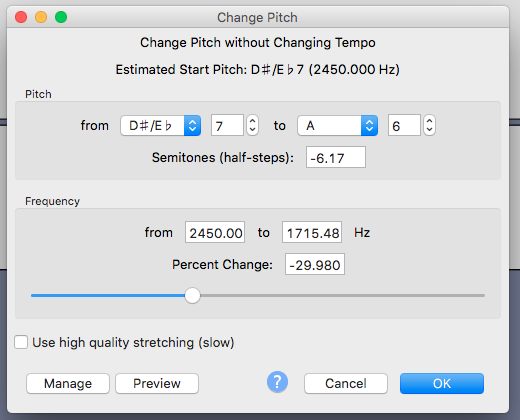
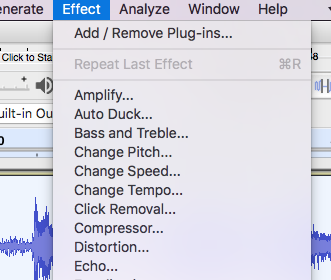
Alternatively, you can choose to change the pitch of the recording using the “Change Pitch” effect of the Audacity software. Through this activity, students can directly observe how a change in frequency can lead to a change in pitch.
Changing the pitch down by 30% if you are a “Laurel” hearer who wants to listen to what “Yanny” sounds like. Raise the pitch by 30% if you are young enough to hear “Yanny”. If that does not work, play around with other values of pitch change.
Finally, if there is sufficient time that can be devoted to this topic, students can be asked to make a presentation on the relationship between frequency and pitch, and demonstrate that they can apply what they have learnt to other real-life applications such as ultrasound and music.
I have not been posting in this blog for a while as I have been rather busy in my new role at the Ministry of Education HQ. My main area of work is related to the Singapore Student Learning Space, an online portal in which curriculum-aligned resources are made available for students in Singapore to learn anytime, anywhere. It’s about to be rolled out to all non-pilot schools soon, so I won’t be posting here for a while longer.
Until then, please let me know if there are any simulations or resources that you would like me to work on. Any such work will have to be during my free time, somewhere between rest and family time.
My school organises a competition for upper primary pupils in Singapore annually. Called the THINK Challenge, it gets participants to engage in problem-solving with a little help from the internet, team work and experimentation. “THINK” stands for the stages of the cycle of inquiry learning: Trigger, Harness, Investigate, Network and Know.
In this year’s Challenge, participants were tasked to construct a water wheel that is able to lift a 20g mass up a height of 30cm. This task is known as the “Trigger”. Participants were given 30 min on the internet to gather information while also “harnessing” their prior knowledge on energy conversions, frictional force, etc.
They were then given time during the “Investigate” phase to experiment and test out their prototypes. Our student facilitators then assisted to test the efficiency of their prototypes based on the amount of water used to lift the mass over the required distance.
In the “Network” phase, participants had to make a short presentation in front of a panel of judges, explaining the scientific principles involved, design considerations, limitations and suggestions for improvement.
Finally, the competition was wrapped up with a brief summary of the learning points in the “Know” stage just before handing out the prizes.
The winning teams this year were:
1st place: Maha Bodhi Primary School Team 1
2nd place: Bedok Green Primary School Team 1
3rd place: Haig Girls’ School Team 1
What Makes a Good Water Wheel?
Through this competition, we hoped that participants picked up new scientific knowledge through the inquiry-learning approach.
Some of the considerations needed when constructing and testing the water wheel include:
- Ways to reduce friction. Most participants realise early on that they need to allow the axle of the water wheel to turn with minimal friction. This means that they need to insert the chopstick given to them into a straw, and affix the water wheel to the straw while clamping the chopstick to a retort stand (a requirement for the competition). They also need to ensure that the string does not end up winding around the chopstick.
- Mass of water wheel. A heavy water wheel tends to be harder to turn due to a larger moment of inertia as well as greater friction at the axle.
- Finding an optimal height to pour the water from. They were given a bottle to pour out the water from and were allowed to pour the water from any height. While it makes sense to pour the water high above the wheel initially to achieve maximum gravitational potential energy, it was also resulting in inaccuracy and needless splashing of water.
- The type and arrangement of the water “buckets”. The buckets for carrying water in order to turn the wheel can be made of disposable cups or spoons, and should be arranged in regular intervals to ensure smooth rotation of the wheel. There has to be an optimal number of such buckets because if they are spaced too far apart, the lifted mass will turn the water wheel back in the opposite direction whenever the buckets are not doing work.
- The position at which to tie the string to the weight. The mass to be lifted is attached to a string and this string has to be fixed to the turning wheel. If the string is tied too close to the circumference of the wheel, there may not be sufficient torque to lift the weight. If the string is too close to the axle, it will require more turns in order to lift the weight by the requisite height. The winning team managed to create an optimal distance between the string and the axle by using ice cream sticks.